Posts

Showing posts with the label craft

Homemade Rainbow Crayons

Image
I wanted to share a little post about a craft that we did a few weeks ago, we created rainbow crayons from loads of old broken crayons and they turned out amazing. I saw a video for this on Facebook and thought that it would be a great way to sort out Lilly's crayon box as she had so many broken ones that we were going to throw out. This is so simple to recycle these old crayons and create some magic crayons.  You will need. - Old Crayons - Silicon Cake Trays - Old Chopping Board - Knife To do. 1. Preheat the oven to Gas mark 4/160oc 2. Remove all the paper from the outside of the crayons 3. Cut the crayons into small pieces  4. Once all cut place a mixture of crayon pieces into the cake trays 5. Place the trays into the oven and bake for 8 minutes (until all melted) 6. Once baked, remove from oven and let cool.  7. Once cool, pop out the crayons and you have some cool crayons. We love the crayons that we have made, they are ...
Making fossils • Summer Holiday Project 2016 #31

Image
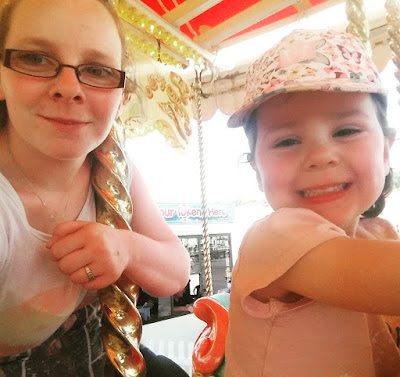
Today we spent a couple of VERY warm hours on Hastings pier, enjoying the sunshine and having a catch up with my Mum and Dad.  We started off with lunch at the chippy on there, we had chips and curry sauce again, the curry sauce is amazing and you get so many chips too. Afterwards Lil's had her first ride on a merry go round, I had to go on as weel as she was tok small, not that I am conplaining. It was lovely to hear and see the elation on her face. Afterwards we needed to find some shade as the sun was incredibly hot, we found that inside there was some family crafts activities to do. We ended up making a fossil out of a coffee dough. I didn't copy the recipe down but have found the same sort of thing online - 1 cup of used coffee grounds - 1/2 cup of cold coffee - 1/2 cup of salt - 1 cup of flour - waxed paper. You mix all the dry ingredients together to make a dough, slowly add the cold coffee so not to make it too runny. Once the d...

Halloween 2015

Image
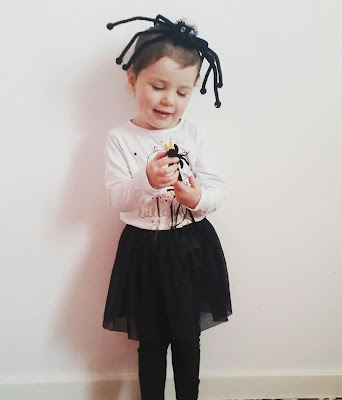
We had a very queit and relaxed Halloween with a couple of crafts, a costume and a spooky dinner to finish the night off. He cute little Spider princess costume was from Aldi and was only about £3 which I thougt was a brilliant price, and she looks super cute too. She loved being the spider princess and was waving her wand about at me and Daddy, turning us into bugs. We made a bracelet with a kit that I got last year fron Sainsbury's and after we made some toilet roll monsters. You will need: - Painted toilet rolls - Glue - Anything you want to add. Lilly loved adding the stars and deciding what face I should draw on the front. I pre-painted the tubes a few days ago and hadn't got around to it till yesterday, but it gave us an extra thing to do. At dinner time I wanted to keep the Halloween theme going so I made her a kind of spooky spider dinner. This was a waffle, a sausage square (cut into a spider shape), sweetcorn and gravy. ...

Pumpkin carvings • Halloween

Image
We have been busy carving pumpkins for Halloween and wanted to share our carvings with you. Firstly my other half created this wonderful wolf, he did a fantastic job on it. Last year the daily mail had a pumpkin carving tamplates page of which my other half chose to do this one. It took him about an hour woth making the holes around the template and then carefully cutting out the shape. Then making it perfect by gettibg rid of any unwanted bits. I think he did a brilliant job and it looked so spooky all lit up  The next one way my creation. I wanted to make mine look scary so made everything quite triangular and angry looking.  I just drew the face on then cut into the pumpkin using a pumplin carving kit from poundland. Lastly lilly wanted a happy pumpkin which she helped scoop all the inards out of.  She also helped me cut the pumpkin but made sure I had hold of the little saw so I could stop at any point for any reason. She loves s...

Halloween craft for toddlers

Image
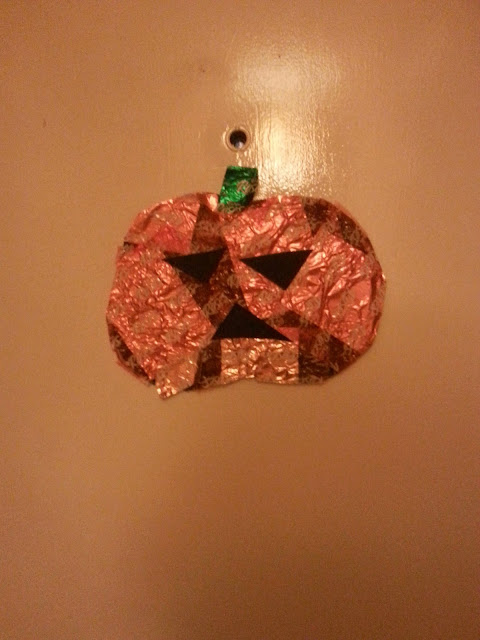
So today Lilly did her first ever Halloween craft with me. I was clearing out her craft cupboard I came across a bag of sweet wrappers and thought about something I could make. So here it is, our sweet wrapper pumpkin, quick and simple. You will need: - Some card - Sweet wrappers  - Glue - Scissors - Chalk Firstly draw your pumpkin or other shape onto the card with chalk or light crayon. Next glue the entire shape inside, Lilly did most, I just filled the area in. Next let your little ones stick down the wrappers which match your theme and picture. We used orange and gold for the face and green for the stalk. make sure all the wrappers are secure and glue down amy over laps.    Next is to cut it out and tidy the edges. To make the face I took the corners of the offcut card and got lilly to stick into place with help of pointing out roughly where. So simple and cheap to do. XxX

Rural Past Times

Image
We thought that we would take a trip to Rural past times this year, it was only a 10 minute drive away.  Here are a few snaps from today. Lilly loved the little tikes car her cousin had out there. These beautiful shire horses, so tall and look so strong, Lilly had never seen a horse up close before. This is an amazing music stand which plays music and had some visible moving parts, such a beautiful example of the past. Nanny brought her a lovely new hat from one of the handmade stands, and we found this beautiful bench carved out with owls. Lilly met her 2nd cousin today, they had lots of fun playing together in the sand and the car, it was so adorable. I think that it tired Lilly out as she went to sleep no trouble bless her. She has been spoilt and came home with the new hat, a shape sorter and an inflatable minnie mouse. All in all a wonderful day :)  xx